How to Align Two Objects on an Axis in Blender
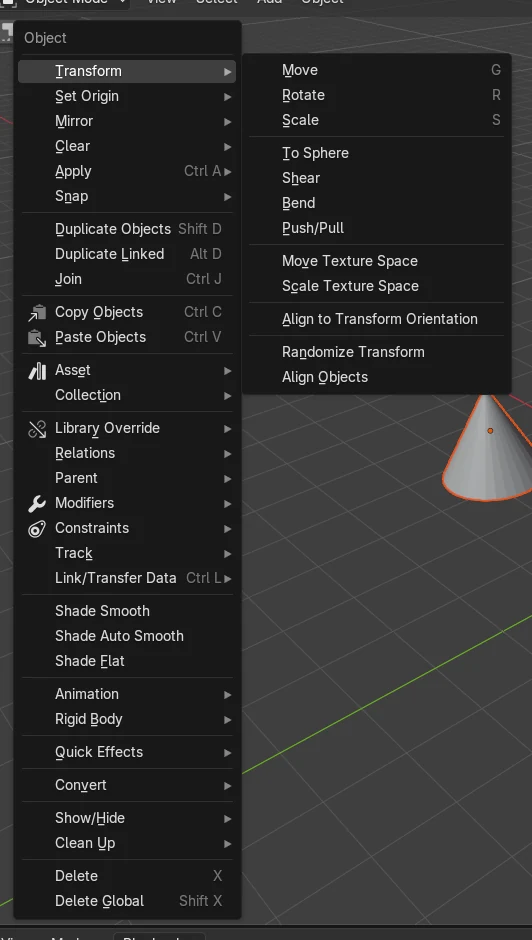
Select the objects you want to move, then select the target object last so it is active. Open Object › Transform › Align Objects and choose the axis, for example X. The other axes stay where they are.
- Mode
- Object Mode, 3D Viewport
- Menu
- Object › Transform › Align Objects
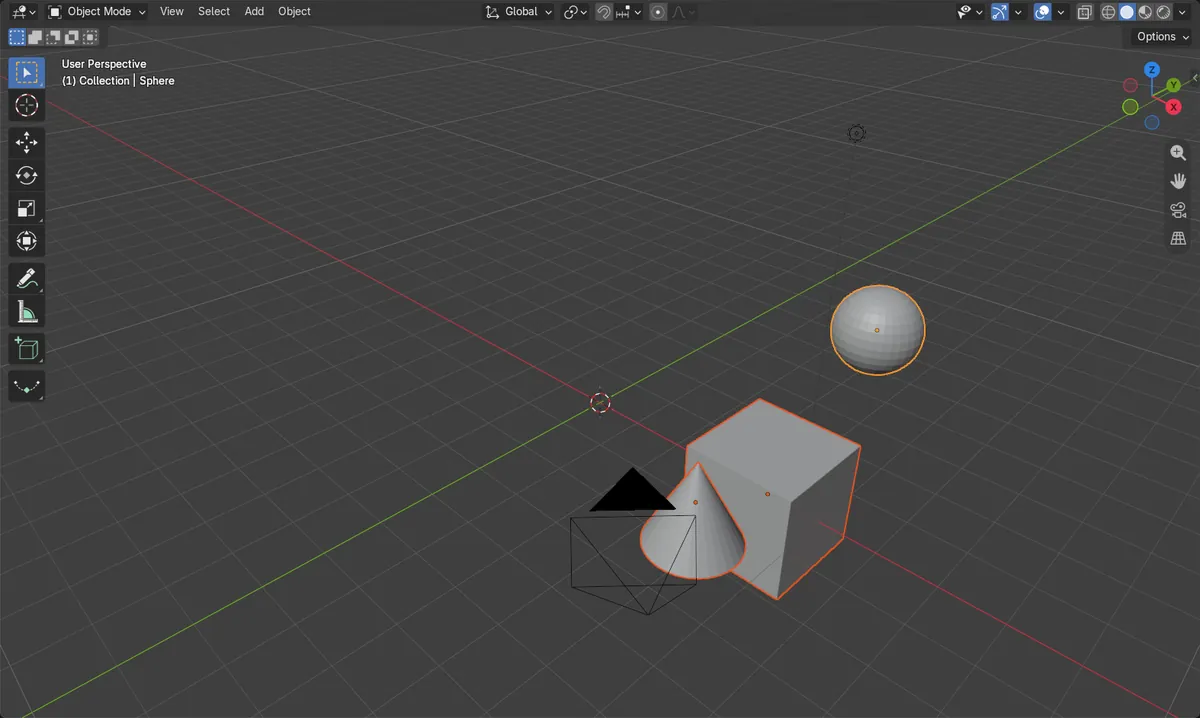
Use Align Objects
Object › Transform › Align Objects. Tick only the axis you want.
Active object is target
Click the target last. The others move to it.
Other axes untouched
Only the ticked axis changes. Y and Z stayed the same in the test.
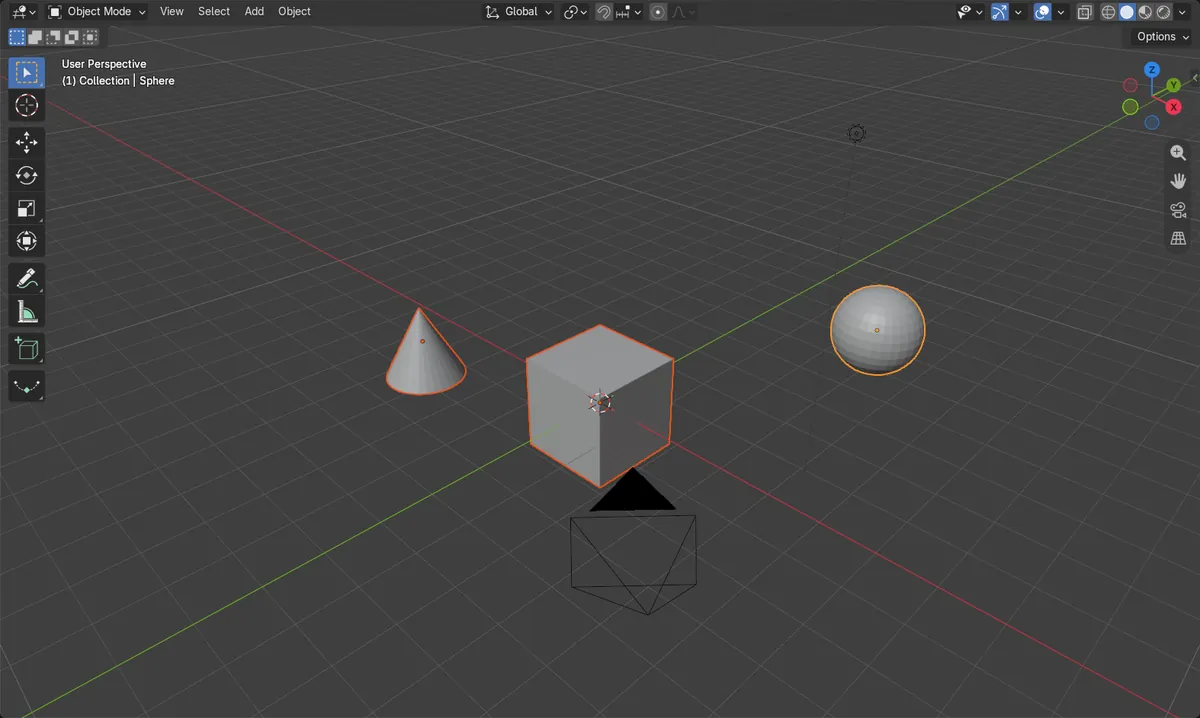
Before and after

AI Scene Builder is a Blender add-on. You type what you want, and it builds it in your scene: buildings, neon signs, wet pavement, fog and lights. Nothing in this picture was modeled by hand.
On a phone now? The add-on runs in Blender on a computer. Send yourself the link and open it there.
Step by step (Blender 5.x)
- In Object Mode, click the objects you want to move, then Shift-click the target object last so it is the active one.
- Choose Object › Transform › Align Objects.
- In the Align Objects panel that appears, set Relative To to Active.
- Set Align Mode to Center and tick only the axis you want, for example X.
- Check the Location fields in the Object tab › Transform panel to confirm that axis now matches the active object.
Other ways to do it
- Object › Snap › Selection to Active moves the selected objects fully onto the active object, on all axes.
- Right-click in the viewport in Object Mode and open Snap for the same Selection to Active item.
- Type a matching value into Location in the Object tab › Transform panel.
Common snags
Wrong object is active
If the wrong object moves, the active object was not the one you wanted as target. Select again and Shift-click the target last.
Every axis changes
If objects jump fully onto each other, more than one axis is ticked, or you used Selection to Active. Tick only one axis in the Align Objects panel.
Menu item missing
Align Objects is in the Object menu in Object Mode. Switch out of Edit Mode and hover over the 3D Viewport first.
Or type one line in AI Scene Builder
AI Scene Builder is a Blender add-on that carries out the steps for you from one typed request. For this task, type a request like this one, using your own object names:
Align the selected objects to the active object on the X axis only A lighthouse island at sunset built with the add-on from 10 typed requests. See every request →
Questions
How do I align objects on only one axis in Blender?
Use Object › Transform › Align Objects and tick only that axis. The other axes are left alone.
Which object do the others align to?
They align to the active object, the one selected last, when Relative To is set to Active.
What the pictures show
- The Sphere (active) started at X 4 m, the Cube at X 0 m and the Cone at X -3 m.
- After aligning on X, the Cube and the Cone moved to X = 4 m, the Sphere's X.
- Sphere stayed at Y 3 m, Z 2 m; Cone stayed at Y -2 m, Z 1 m.
- The result was the same in Blender 4.2 LTS and Blender 5.x.