How to Make an Isometric Room in Blender with an AI Room Generator (Blender 5.3)
To make an isometric room in Blender, describe it to the Scenewright add-on one part at a time: the floor and two walls first, then the bed, desk, shelves, plants and lights. The room below was built that way from an empty scene in 23 typed requests, with no hand modeling, and every one of those requests is shown on this page, ready to copy.
- Built from
- An empty scene and 23 typed requests
- Used
- 36 credits, about 17 minutes
- You get
- Normal Blender objects you can edit or export
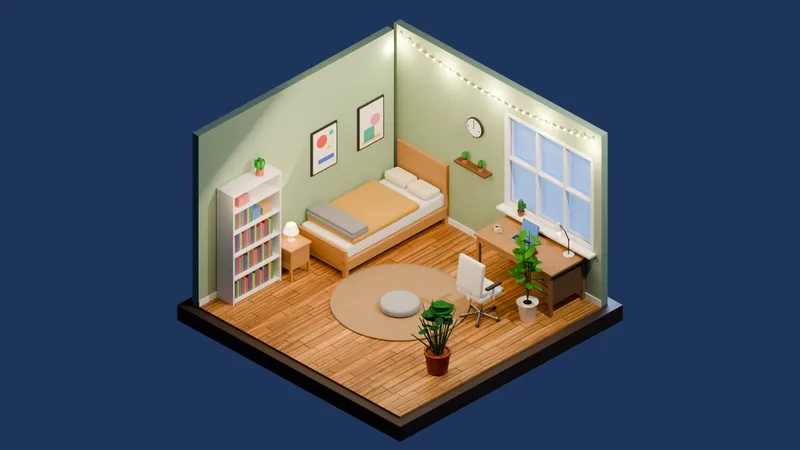
Floor and two walls first
Ask for the base, the floor and the two walls, then add the furniture. Each request builds on what is already there.
Fix it with words
If something looks off, say what to change, like “move the plant to the front right corner”.
Copy the requests as a template
Every request on this page has a copy button. Paste them into the add-on and change the colors and furniture to make the room your own.
Blender isometric room tutorial: every request, step by step
These are the requests as typed, in order, each with a quick viewport preview taken right after it. 23 requests were used in all: the 7 below built the room, and 16 were follow-ups to move or fix things. Two of those are shown further down, and the full list of all 23 follows them, so you can use it as an isometric room template: paste the requests into the add-on and make the room your own.
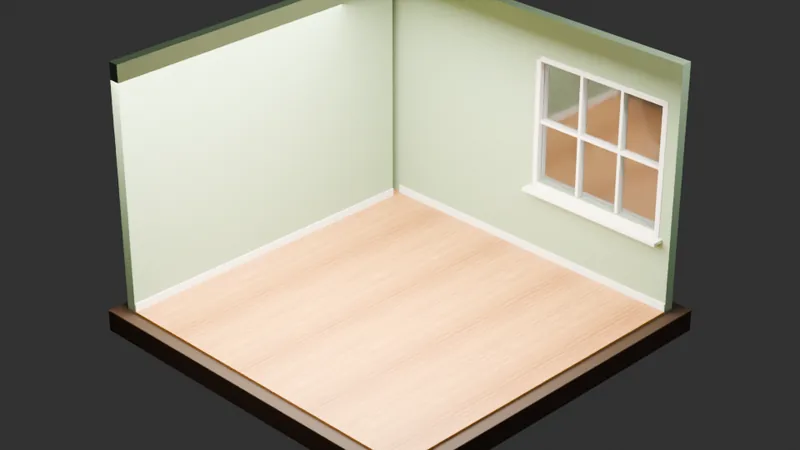
Request 1Floor, base and two walls
Make a small isometric room, like a cozy diorama: a square floor about 4 m by 4 m on a thick base about 25 cm deep, and only two walls, one at the back and one on the left, about 2.8 m high, so we look in from the front right corner. Light oak plank floor, soft sage green walls with a white skirting board, and a wide window in the right half of the back wall.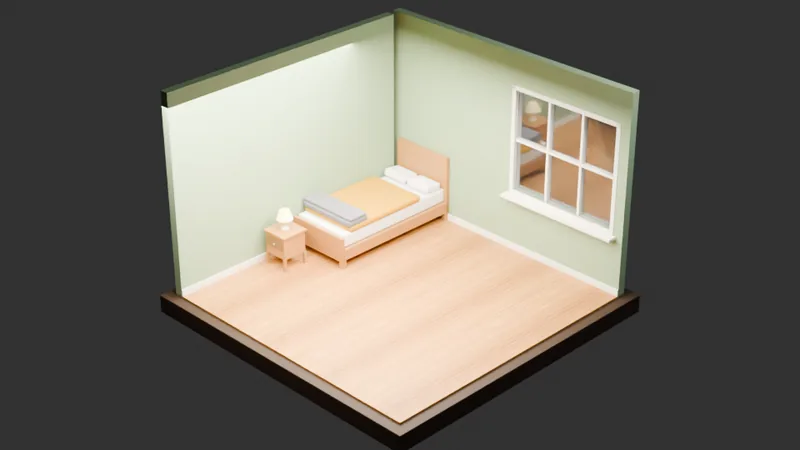
Request 2Bed and nightstand
Against the left wall, with the headboard at the back wall, add a single bed with a light wooden frame, a white mattress, a mustard yellow duvet, two white pillows and a folded grey knitted blanket at the foot. Next to it, toward the front, put a small wooden nightstand with a little lamp on it.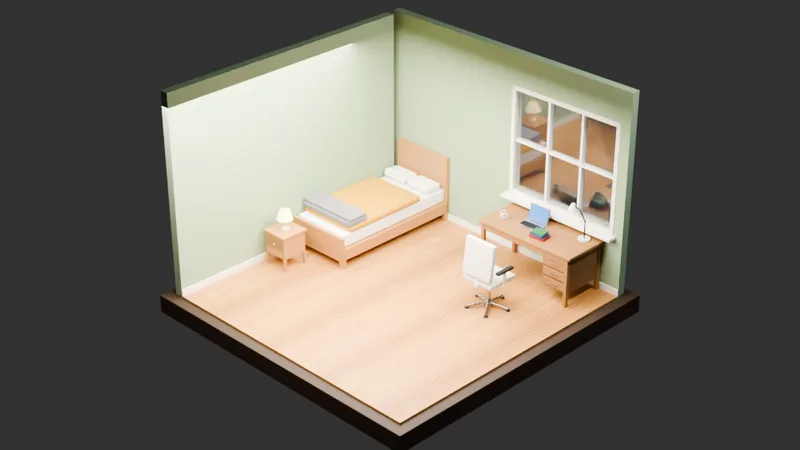
Request 3Desk and chair
Under the window on the back wall, add a light wooden desk with a laptop, a desk lamp, a mug and a small stack of books on it, and a white office chair in front of the desk, facing it.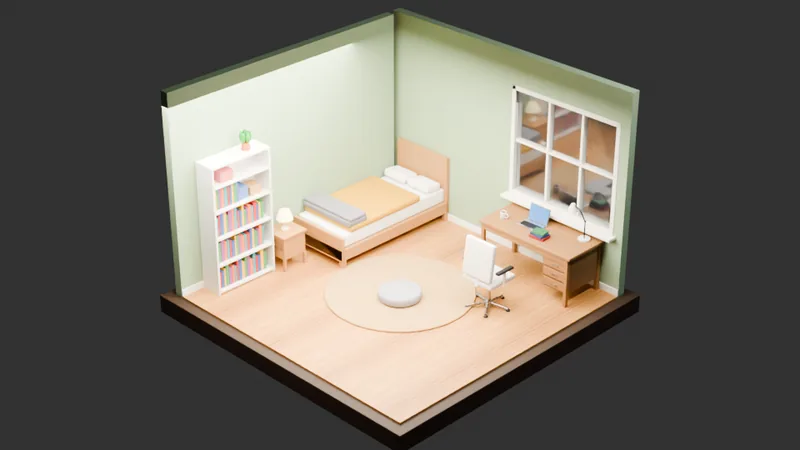
Request 4Bookshelf and rug
On the left wall, closer to the front than the nightstand, add a tall white bookshelf filled with colorful books, a few small boxes and a little potted plant on the top. Then put a big round woven jute rug on the floor in the middle of the room, with a soft grey floor cushion on it.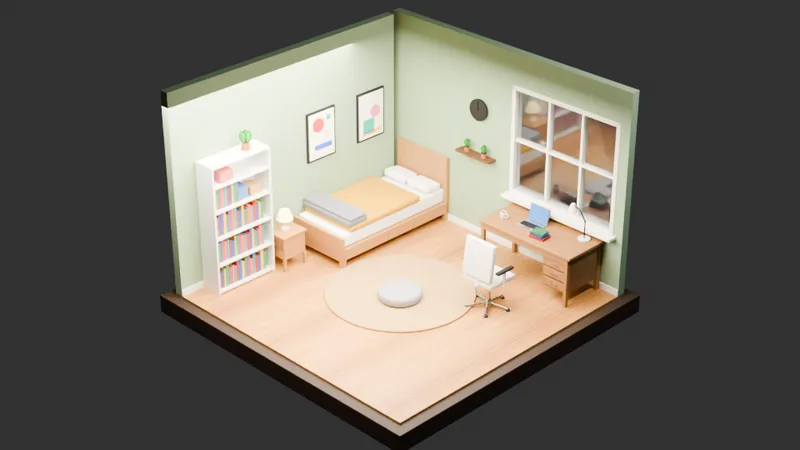
Request 5Posters, shelf and clock
Decorate the walls: hang two framed posters with simple colorful abstract shapes on the left wall above the bed, put a small floating wooden shelf with two tiny potted plants on the back wall between the headboard and the window, and a round white wall clock above that shelf.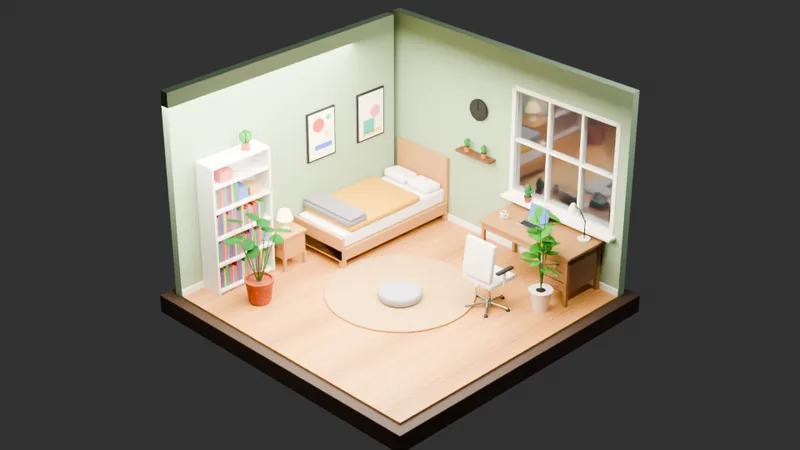
Request 6Plants
Add some plants: a big leafy monstera in a terracotta pot on the floor in the front left corner next to the bookshelf, a tall leafy plant in a white pot on the floor at the right end of the desk, and a small cactus on the window sill.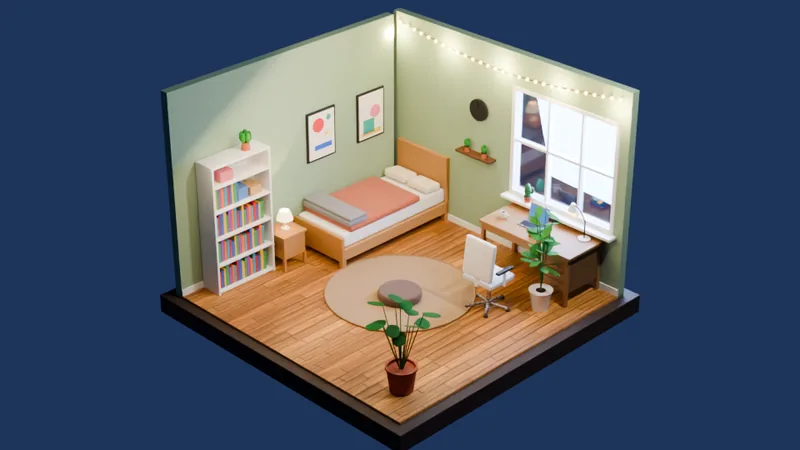
Request 12Cozy evening light
Make it a cozy evening: warm glowing light from the bedside lamp and the desk lamp, a string of small warm fairy lights along the top of the back wall, soft blue dusk light coming in through the window, and a soft warm fill so the room is not too dark.
The step pictures are quick viewport previews. For the large pictures on this page, the camera and render settings were set by hand.
Not quite right? Say what to change
There is no need to start over. A short request changes what is already in the scene.
Request 7Move the big plant
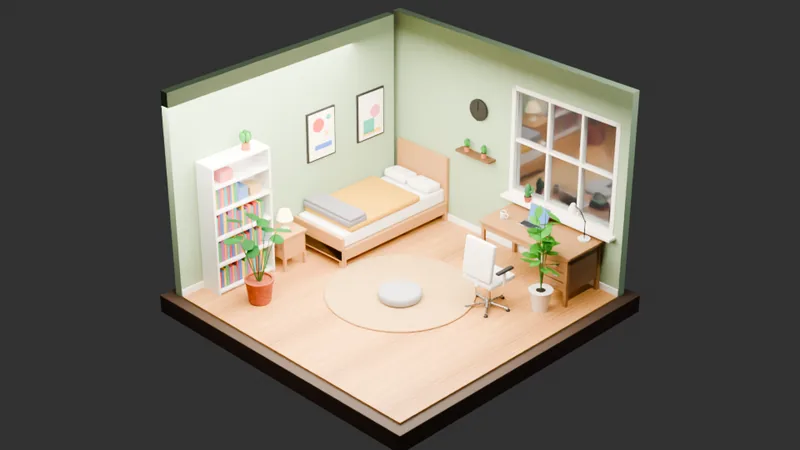
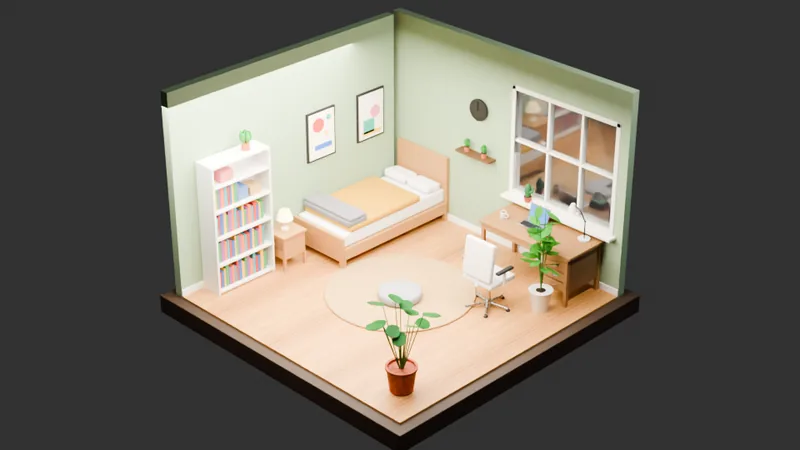
The monstera stands right in front of the bookshelf and hides the books. Move it to the right side of the room, on the floor near the front right corner.Request 13Bring the colors back
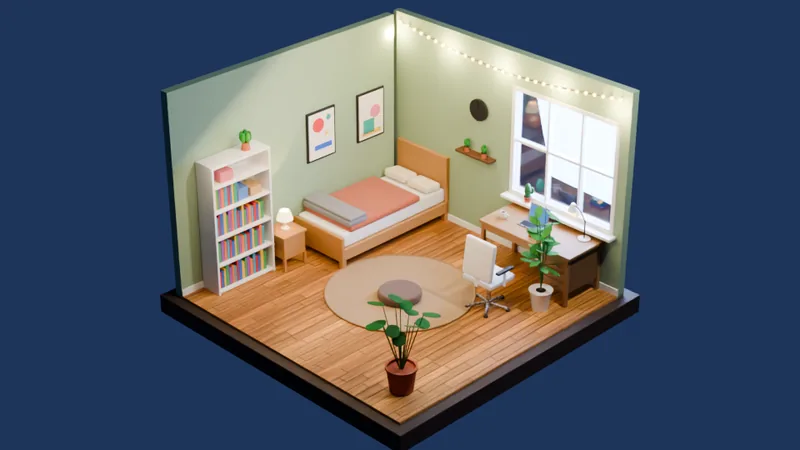
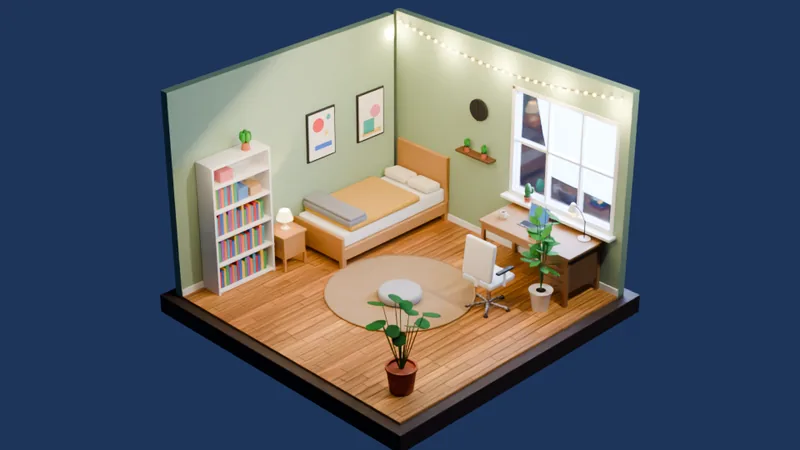
The duvet is still pink and the floor cushion is still brown in the render. Please really change their fabric pattern colors: mustard yellow duvet, soft grey cushion.All 23 requests, in order
Every request typed for this room, including the small fixes. Each line says what changed in the scene.
- Request 1Built
The base, the plank floor, two walls with skirting and the window.
Make a small isometric room, like a cozy diorama: a square floor about 4 m by 4 m on a thick base about 25 cm deep, and only two walls, one at the back and one on the left, about 2.8 m high, so we look in from the front right corner. Light oak plank floor, soft sage green walls with a white skirting board, and a wide window in the right half of the back wall. - Request 2Built
The bed with bedding and blanket, the nightstand and its lamp.
Against the left wall, with the headboard at the back wall, add a single bed with a light wooden frame, a white mattress, a mustard yellow duvet, two white pillows and a folded grey knitted blanket at the foot. Next to it, toward the front, put a small wooden nightstand with a little lamp on it. - Request 3Built
The desk with laptop, lamp, mug and books, and the office chair.
Under the window on the back wall, add a light wooden desk with a laptop, a desk lamp, a mug and a small stack of books on it, and a white office chair in front of the desk, facing it. - Request 4Built
The bookshelf with books, boxes and a plant, the round rug and the floor cushion.
On the left wall, closer to the front than the nightstand, add a tall white bookshelf filled with colorful books, a few small boxes and a little potted plant on the top. Then put a big round woven jute rug on the floor in the middle of the room, with a soft grey floor cushion on it. - Request 5Built
Two posters, the floating shelf with plants and the wall clock.
Decorate the walls: hang two framed posters with simple colorful abstract shapes on the left wall above the bed, put a small floating wooden shelf with two tiny potted plants on the back wall between the headboard and the window, and a round white wall clock above that shelf. - Request 6Built
The monstera, the tall plant by the desk and the cactus on the sill.
Add some plants: a big leafy monstera in a terracotta pot on the floor in the front left corner next to the bookshelf, a tall leafy plant in a white pot on the floor at the right end of the desk, and a small cactus on the window sill. - Request 7Changed
The monstera moved to the front right of the room.
The monstera stands right in front of the bookshelf and hides the books. Move it to the right side of the room, on the floor near the front right corner. - Request 8Did not run
The scene stayed as it was. The next request asked for the same in two smaller parts.
The materials look a bit flat. Give the rug a real woven jute look, make the folded blanket look knitted, make the oak floor planks easier to see, and give the duvet, pillows and floor cushion a soft fabric look. - Request 9Changed
The rug looks woven and the folded blanket looks knitted.
Let's do it in smaller parts. Give the round rug a woven jute look and make the folded grey blanket at the foot of the bed look knitted. - Request 10Changed
The floor planks and the fabrics got more texture; the duvet came out pink and the cushion brown.
Now make the oak floor planks easier to see, and give the duvet, the pillows and the floor cushion a soft fabric look. - Request 11No visible change
The colors in the render did not change, so request 13 asked again.
The duvet turned pink and the floor cushion turned brown. Keep the soft fabric look, but make the duvet mustard yellow again and the floor cushion soft grey. - Request 12Built
Glowing lamps, fairy lights along the back wall, dusk light through the window and a soft fill.
Make it a cozy evening: warm glowing light from the bedside lamp and the desk lamp, a string of small warm fairy lights along the top of the back wall, soft blue dusk light coming in through the window, and a soft warm fill so the room is not too dark. - Request 13Changed
The mustard duvet and the grey cushion are back.
The duvet is still pink and the floor cushion is still brown in the render. Please really change their fabric pattern colors: mustard yellow duvet, soft grey cushion. - Request 14Changed
Clear glass with an evening sky, a white clock face and a fuller monstera; the sky panel and the new leaves came out too big.
Nice, the colors are right now. Three small fixes: the window glass looks like a mirror reflecting the room, make it clear glass with a soft blue evening sky outside; make the wall clock face white with dark hands; and make the plant in the front right corner a fuller, bushier monstera with more big leaves. - Request 15Changed
A smaller sky panel and smaller leaves; the panel sat too high.
Two problems: the blue sky panel behind the window is too big and sticks out past the right edge of the back wall, so shrink it to just a little larger than the window so it is only seen through the glass. And the monstera leaves got too big and float above the pot: make them about half the size, attached to the ends of the stems, so it looks like a natural bushy plant about 1.1 m tall. Also the clock face still looks black, please make the clock face white. - Request 16Changed
A white clock with a thin dark rim; the sky panel moved down, with a thin strip still showing.
Closer, but the sky panel now sits too high and sticks out above the top of the back wall. Move it down so it is centered right behind the window. And the white clock face is hidden inside the dark rim: bring the white face slightly in front of the rim, so we see a white clock with a thin dark rim. - Request 17Did not run
The scene stayed as it was. Request 18 said it more simply.
Almost there. A thin strip of the blue sky panel still peeks out past the right end of the back wall. Put the sky panel right up against the outside of the back wall and make it only slightly bigger than the window opening, so nothing shows outside the room. - Request 18Changed
The sky panel got its new size; it sat too high again.
Let me say it more simply: move the blue sky panel so it sits just behind the back wall, about 2 cm outside it, and make it 1.7 m wide and 1.5 m tall, centered on the window. - Request 19Changed
The sky panel lines up with the window.
The sky panel jumped up again and now sticks out above the wall. Its bottom edge should be at about 0.85 m and its top edge at about 2.35 m, the same height as the window. - Request 20Taken back
The pot went past the floor edge, so request 21 was typed on the scene from before this request.
Last touch: the monstera now stands in front of the rug and hides the floor cushion. Move the whole plant with its pot further right, to the floor about 40 cm in from the front right corner of the room. - Request 21Changed
The monstera moved toward the desk, and the floor cushion is in view.
That pushed the pot off the edge and the extra leaves still cover the cushion, so let's go back one step. Keep the monstera where it was, but move the whole plant, together with its extra leaves, about 70 cm along the right side of the floor toward the desk, so the floor cushion on the rug is clearly visible. - Request 22Changed
The extra stems moved into the pot; their leaves stayed in the air.
Seen from another side, the extra monstera leaves and their stems float in mid-air above the rug, about a meter away from the terracotta pot. Move that whole group of extra leaves and stems so they grow up out of the soil in the monstera's pot, like one bushy plant. - Request 23Changed
The leaves sit on their stems. This is the finished room.
The extra stems moved into the pot, but their big leaves did not come along: those leaves still hang in the air above the rug. Move each of those leaves onto the top end of its own stem in the pot.
What you can do with the finished room
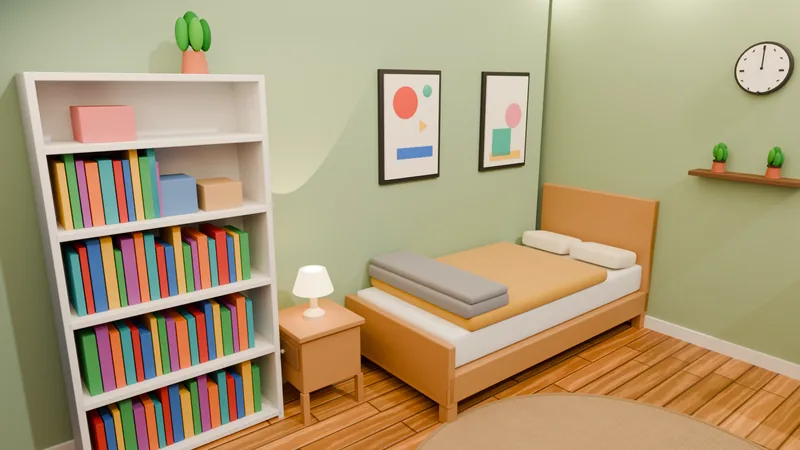
Render it your way
Set an orthographic camera for the classic isometric look, or put the camera inside the room for a closer shot, then render in Blender.
Change it by hand
Every piece is a normal Blender object, so Blender’s own tools work on it: move the desk, swap a color, delete a plant.
Take it to a game engine
Use File › Export › FBX to bring the room’s objects into Unity or another 3D program.
Tips for your own isometric room
Give the size and the open sides
Say how big the floor is, how high the walls are and which two sides stay open, so the room is easy to see from one corner.
One area per request
Bed, then desk, then shelves. A request about one area is easier to get right and easier to undo.
Name materials and colors
“Light oak planks”, “sage green walls”, “mustard yellow duvet”. The add-on uses these words when it makes the materials.
Use an orthographic camera
In the camera’s properties, set Type to Orthographic and look at the room from about 45° above one corner for the isometric look.
Install it in 3 steps
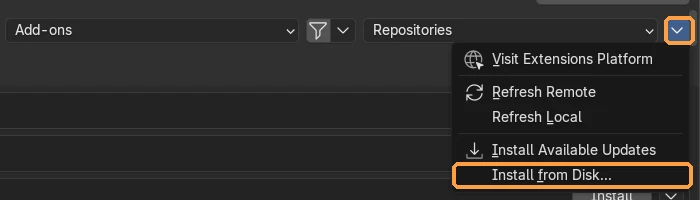
- Download the .zip from the add-on page and keep it zipped. Drag it into the Blender window, or use Edit › Preferences › Get Extensions › ⌄ menu › Install from Disk….
- Allow online access. The add-on needs the internet to reach the AI. If Blender asks, turn on Allow Online Access in Edit › Preferences › System › Network.
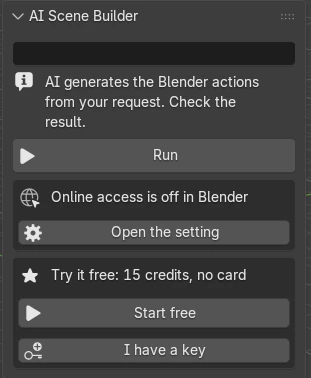
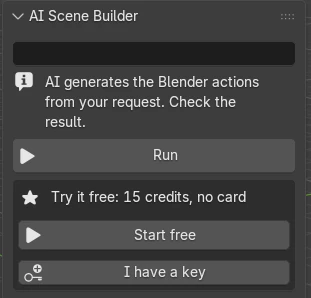
- Start free and type. With the mouse over the 3D Viewport, press N, open the AI tab, press Start free, type a request and press Run.
Price and free trial
Start with 15 free credits. Pick a plan when you want more; cancel anytime.
Free
$0
15 credits to try it. About 5 requests. One trial per computer. No card.
A big request takes at most 5 credits.
Basic
$19 / month
200 credits a month. About 66 requests a month.
A big request takes at most 12 credits.
Pro Recommended
$39 / month
450 credits a month. About 150 requests a month.
A big request takes at most 18 credits.
Studio
$79 / month
1000 credits a month. About 333 requests a month.
A big request takes at most 24 credits.
Try Scenewright in your Blender
Type one request and get editable objects in your open scene. Every request can be undone in one click.
Questions
How do I make an isometric room in Blender without modeling by hand?
Type what you want into the Scenewright add-on, one part at a time: the floor and two walls, then the furniture, decorations, plants and lights. The room on this page was built from an empty scene this way, with no hand modeling. The camera and render settings for the large pictures were set by hand.
Is there an isometric room template I can start from?
Yes. All 23 requests used for this room are on this page with copy buttons. Paste them into the add-on in order, and change the colors, furniture or size to make your own version.
How many requests and credits did this room take?
23 requests and 36 credits, about 17 minutes from the first request to the last. Seven requests built the room. The other 16 were follow-ups, such as moving a plant or fixing a color: 12 changed the scene, and the list on this page shows what happened with each of the rest.
Can I build an isometric room with the free credits?
Yes, the first part of one. Here the floor and walls, the bed, the desk and the bookshelf took 12 credits, which fits in the 15 free credits, so you can see your room take shape before paying. The finished room with all its fixes used 36 credits; the Basic plan gives 200 credits a month.
How do I get the isometric camera angle?
Add a camera, set its Type to Orthographic in the camera properties, and point it at the room from about 45° above one corner, toward the open sides.
Can I take the room into Unity or a game?
Yes. Use File › Export › FBX in Blender and import the file in Unity. Materials can look different there, so check them after import.
Can I change the furniture by hand afterwards?
Yes. Every piece is a normal Blender object with materials, so you can move, edit or delete it with Blender’s usual tools.
Which Blender version do I need?
Blender 4.2 or newer, on Windows, macOS or Linux. The room on this page was made in Blender 5.2.
How much does it cost?
You start with 15 free credits, about 5 requests, with no card. After that, plans start at $19 a month and can be cancelled anytime.
Can I type requests in Japanese?
Yes. Requests can be typed in Japanese or in English. The requests on this page were typed in English.
Limitations
- It is best at props, furniture, simple buildings and small scenes. On complex shapes it can miss details; Undo this request and a more detailed request help.
- It needs Blender 4.2 or newer and an internet connection while a request runs.
- The free trial is one per computer. Payment is not available from China or Russia.
- After FBX export, materials can look different in Unity or other programs and may need adjusting there.
- Something not working? Write to contact
@saas-diary.com and we will help.